This guide explains the full process of purchasing SpamExperts through the Nubius Solutions customer portal and configuring it to protect your domain.
Go to the Nubius Solutions portal
Navigate to portal.nubius.io.
Access the store
If you are not logged in, go to Products.
If you are logged in, go to Store.
Select Email Services
From the store menu, choose E-mail Services.
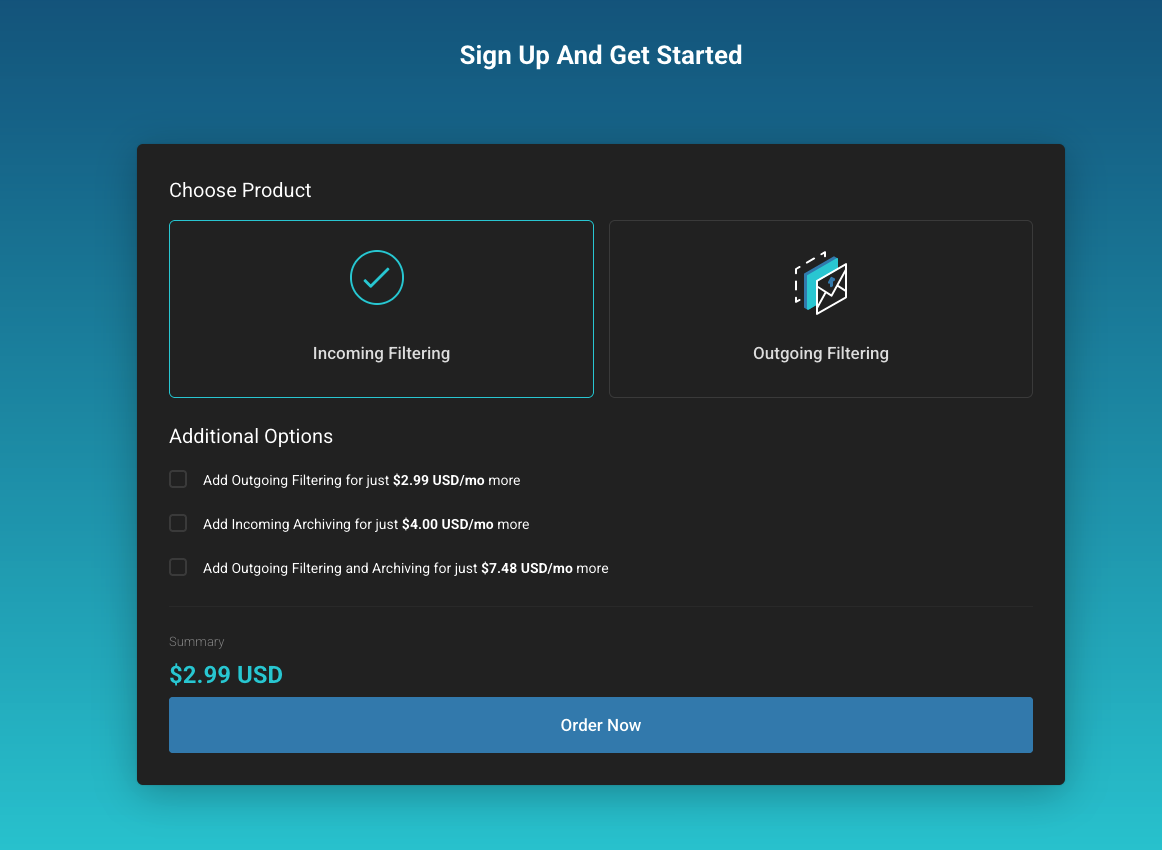
Choose your service
At the bottom of the page, select the service you want to order:
Incoming Filtering
Outgoing Filtering
Email Archiving
Click Order Now.
Enter your domain
Provide the domain you want to protect.
Important: The domain must not already exist in another SpamExperts account with a different vendor, otherwise automatic setup will fail.
Complete the order
Follow the checkout process to finalize your purchase.
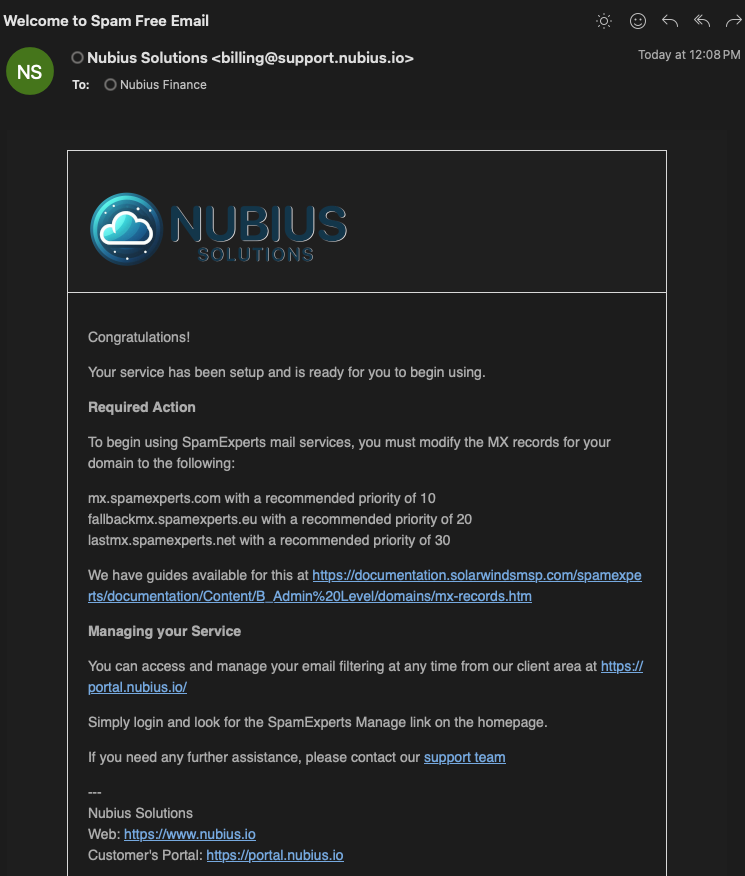
Check your welcome email
After purchase, you will receive an email titled "Welcome to Spam Free Email". This email contains the required MX records:
mx.spamexperts.com with priority 10
fallbackmx.spamexperts.eu with priority 20
lastmx.spamexperts.net with priority 30
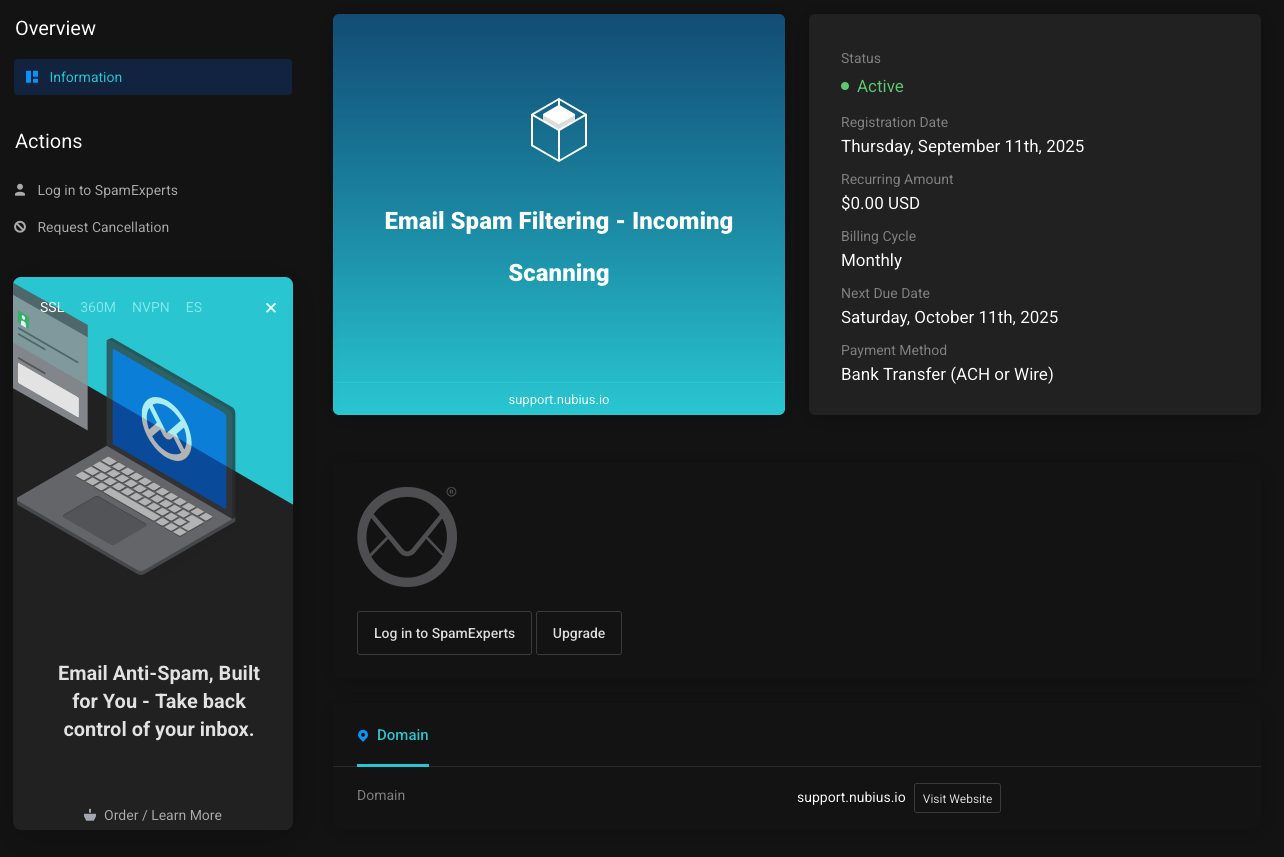
Login to SpamExperts
Go to Services → Email Spam Filtering → Login to SpamExperts from your Nubius portal.
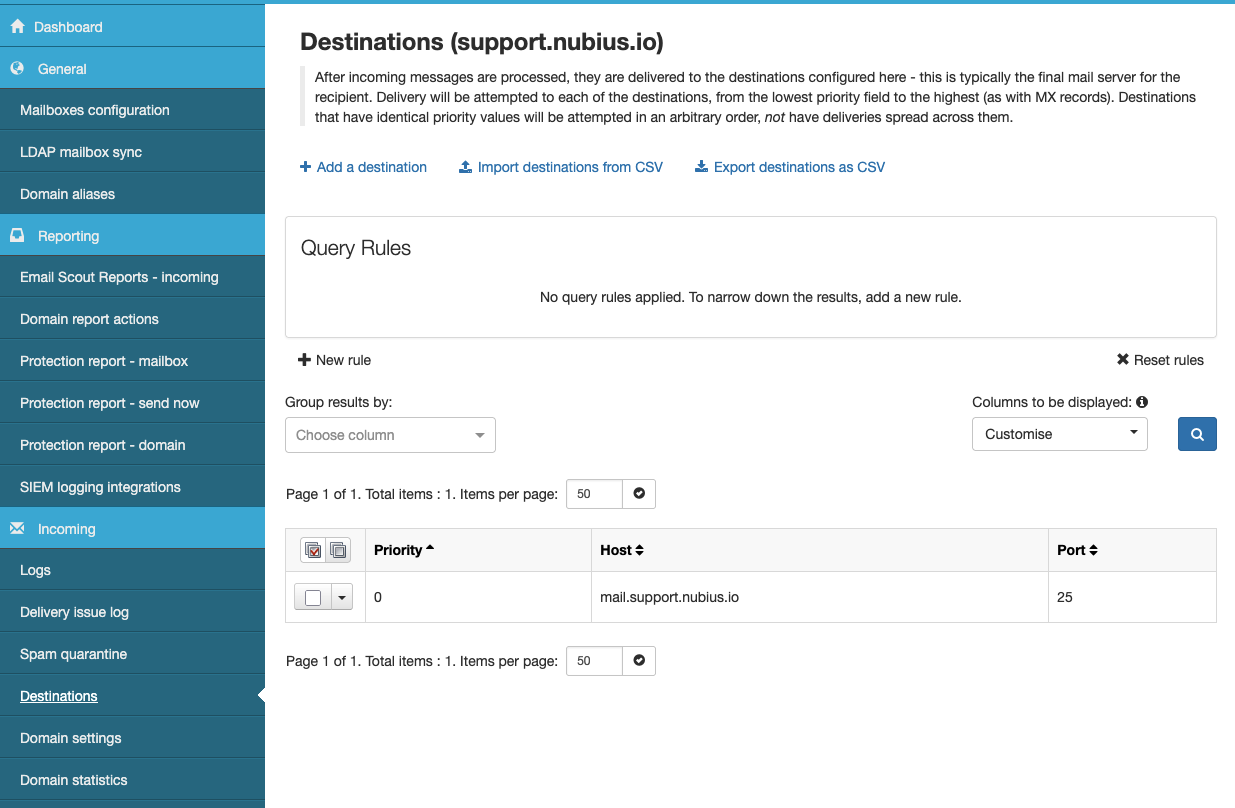
Verify destinations
In SpamExperts:
Go to Incoming → Destinations from the left-hand menu.
If your domain already had MX records, SpamExperts will add that as a route.
Adjust this so the destination is the IP or FQDN of your actual mail server.
Update DNS records
Update your domain’s MX records at your DNS provider to match the MX records provided in your welcome email.
Test delivery
Send a test email to verify that mail is now flowing through SpamExperts to your server.
Some mail servers (such as Exim) require additional adjustments to work properly with SpamExperts.
For Exim4 under Ubuntu with ISPmanager, see the detailed guide:
Configuring Exim4 with ISPmanager (Vultr) and SpamExperts Incoming Filtering

